

I’ve started a monthly column over on Domino where I will be sharing some projects in depth and the first one has been centered around our downstairs kitchen. This week we covered the DIY of our kitchen Island!
Here is another look at the before photo to see where we started.
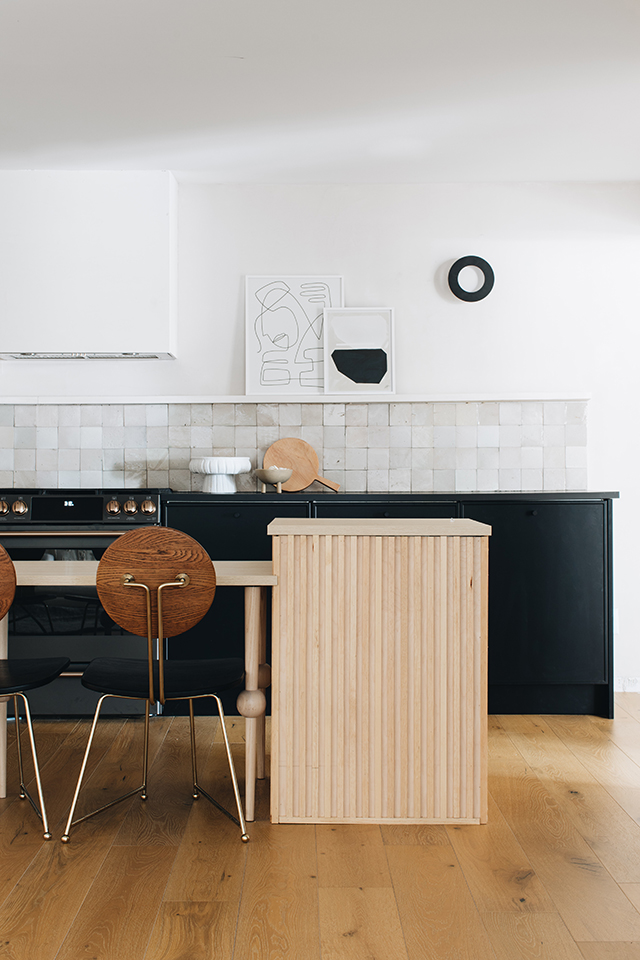

This kitchen flows right into the downstairs living area and what I didn’t like (well there was a lot I didn’t like) mainly was the off center island, and that the fridge and the oven where right next to each other. Oh and the two cabinets with a space in the middle for nothing had me scratching my head too. So it all went away. My dad re-purposed the cabinets in his workshop and my aunt is using the range and the rest is history. I didn’t want to have a huge monolith island here which would cover the beautiful matte black Café range and my own Quarterline cabinet doors from view from the rest of the room and I also did not want to have to move the plumbing since it is set in the concrete floor so my idea for the island with an open center was born. Below are the supplies needed and simple steps. Head over to Domino for all the details.
Supplies needed:
- 2 IKEA 24-inch Sektion cabinets
- 2 4-by-8 sheets of ¼-inch plywood
- 2 IKEA countertops (I used the Ekbacken ones)
- 5 Pretty Peg table legs
- ¾-by-½-inch wood trim for slats (you’ll need enough to make approximately 90, each at 35 inches long)
- Drill
- Finish nail gun
- Finish nails
- Titebond wood glue
- Chop saw
- Table saw
- 2 2-by-4s for the bases
- L-shaped brackets and screws
- Clear polyurethane coat for the finish (I used this one from Varathane)
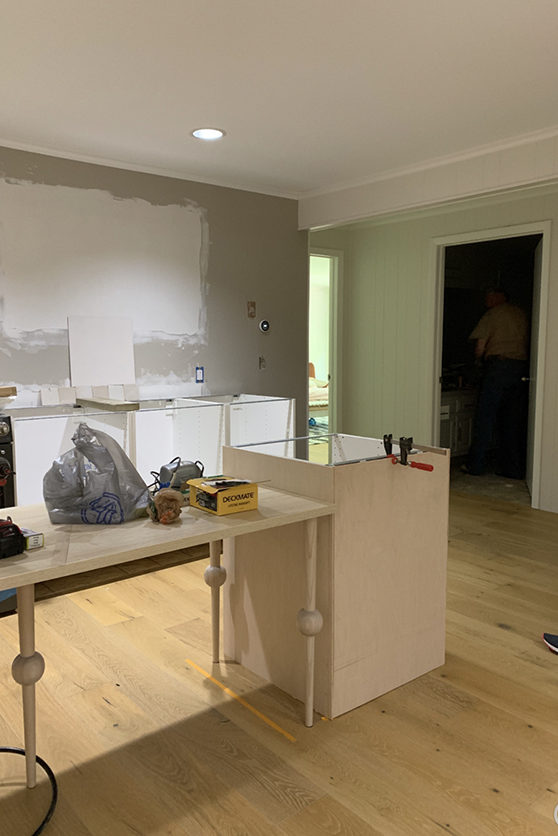
Step 1: assemble Ikea cabinet bases per instructions
Step 2: create a rectangle base out of 2×4’s that sits flush with the cabinet on the back and sides but is recessed 3”s from the front (this makes room for your feet when standing at the sink/front of cabinet.
Step 3: secure the 2×4 base to the floor. we used small L shaped brackets that we screwed into the floor as well as into the inside of the 2×4 base.
Step 4: secure the cabinet on top of the 2×4 base with screws from the inside of the cabinet, screwing directly down into the 2×4 base.

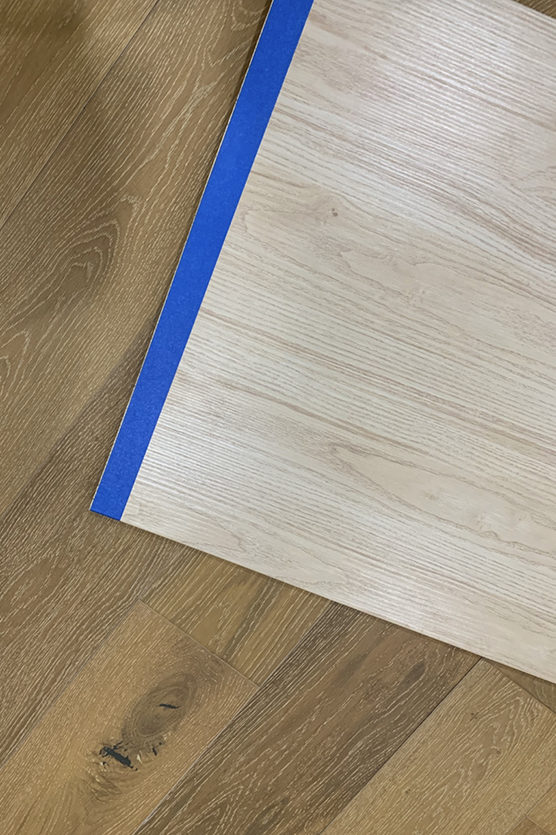
Step 5: cut the countertop to the exact distance between the cabinets. Use painters tape to help to make sure none of the laminate is damaged while sawing.
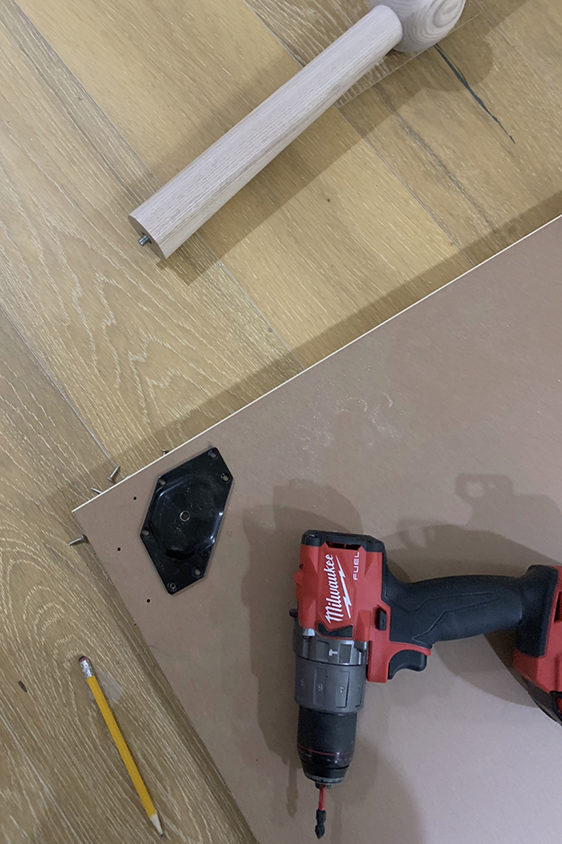
Step 6: attach legs to the countertop and flip it over into place.
Step 7: Cut the plywood to size to cover the sides and back of the cabinets. Secure with glue and finish nails.
Step 8: secure middle countertop to cabinets screwing it from the inside of cabinet into countertop
Step 9: cut the 3/4” trim pieces to match the measurement from the floor to top of cabinet. making about 90 total. attach one by one using glue and the finish nail gun.
Step 10: for the corner pieces use a 3/4” square piece of wood and with a table saw create an L shaped piece of trim.
Step 11: continue the trim/wood slats all the way around the cabinet cutting small pieces for above the table/countertop so it looks like it continues through the countertop.

step 12: cut whole in sink countertop.
step 13: attach small countertops to cabinets per ikea instructions.
step 14: drop in sink and add faucet and unless you have a handy dad (like me) or mom or friend, call a plumber to attach drain and water lines
step 15: attach doors on cabinets with ikea hinges.
Step 16: seal wood with a matte clear coat


SHOP THE LOOK:
Cabinet Doors are Quarterline by Sarah Sherman Samuel for SemiHandmade on Ikea Sektion cabinets // Undercounter Refrigerator by Café Appliances // Range by Café Applinces // Matte Black Hardware by Sarah Sherman Samuel for Park Studio // Eastern Earthenware Tile in Rice Husk by Clé Tile // Chairs by CB2 // Faucet from wayfair // Alfi Sink from Wayfair // Canisters from Hawkins New York // Art is from Wit & Delight // Pedestal Bowl // Range hood is from Ikea with a DIY’d surround // Countertops from Ikea wood look on island and matte black on back cabinet run // Wall hanging by Kudd Krig Home // Wall finish is Portola Paint Roman Clay in Mallorca // Flooring is Engineered Hardwood – Tigers Eye French Oak from Build Direct
Branding and Initial Web Design
Nature
Web Design Production
Jane Reaction
Site Development
Alchemy + Aim
Wow what a transformation! I need those chairs in my life as well
Wow this is genius! It really looks great and unique. You won’t see a lot of islands with a lower center.This is truly amazing!
This looks fantastic! Such a great and usable island space. Also love that simple DIY range hood cover. I’m trying to do something similar with our range hood. Did you use plywood or drywall? Is it framed all around? It looks so thin and simple, I love it! Any tips? Thanks!!
I really liked your idea of explaining everything in detail exactly how it is done. Your efforts are worth appreciating. Thank You.
[…] Check the Idea […]
one of the best kitchen i have seen so far at this level. Appriciate the wood work.
Thank you for these details! What type of wood did you use to create that incredibly long ledge over the tile backsplash?