
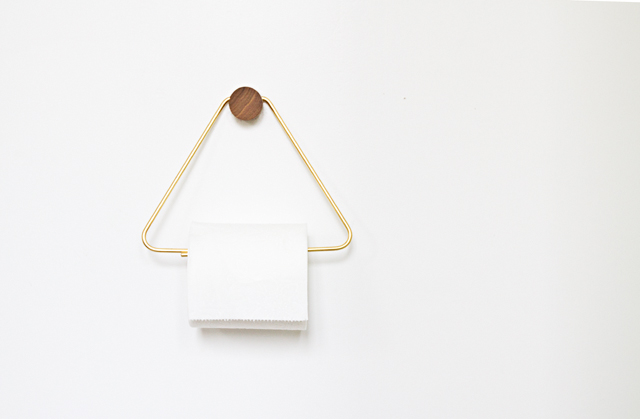
 We also finally got around to installing a toilet paper holder (the prettiest one in all the land, I’m convinced).
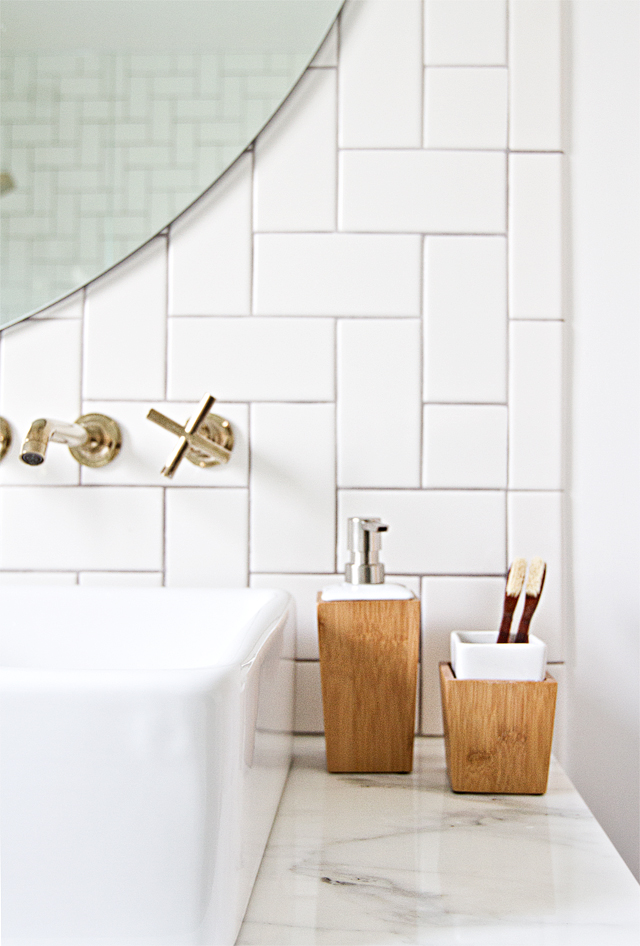
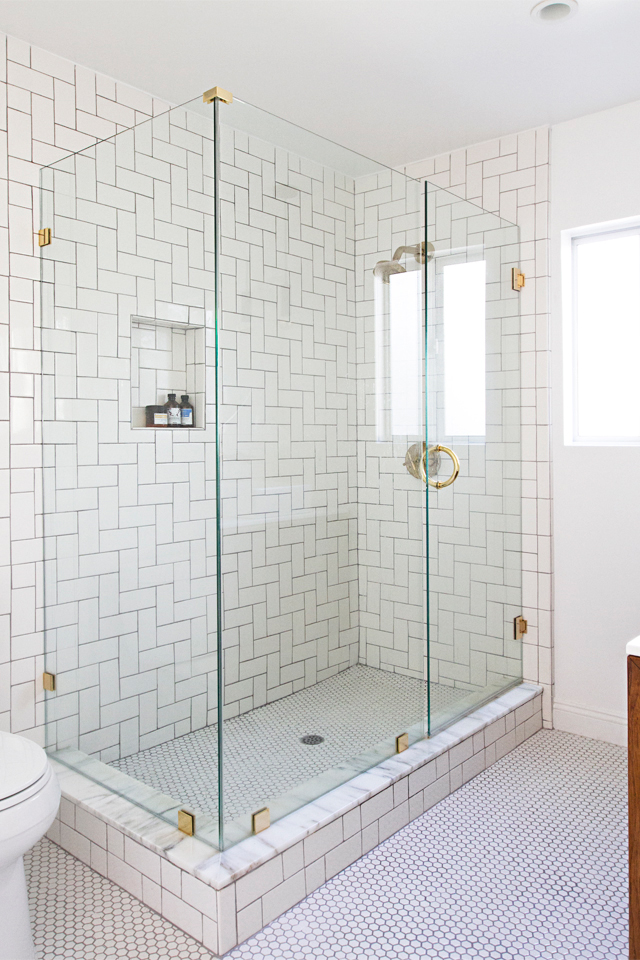
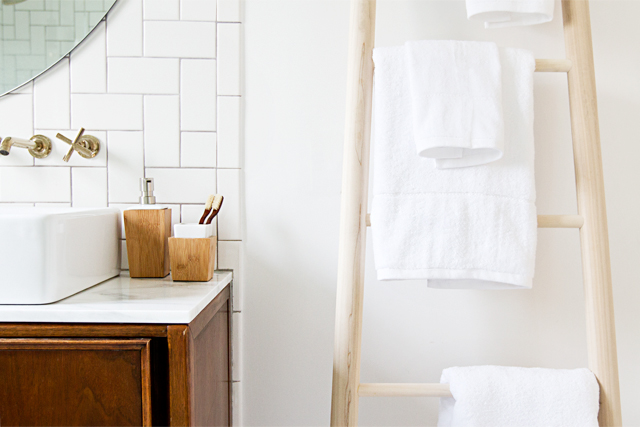
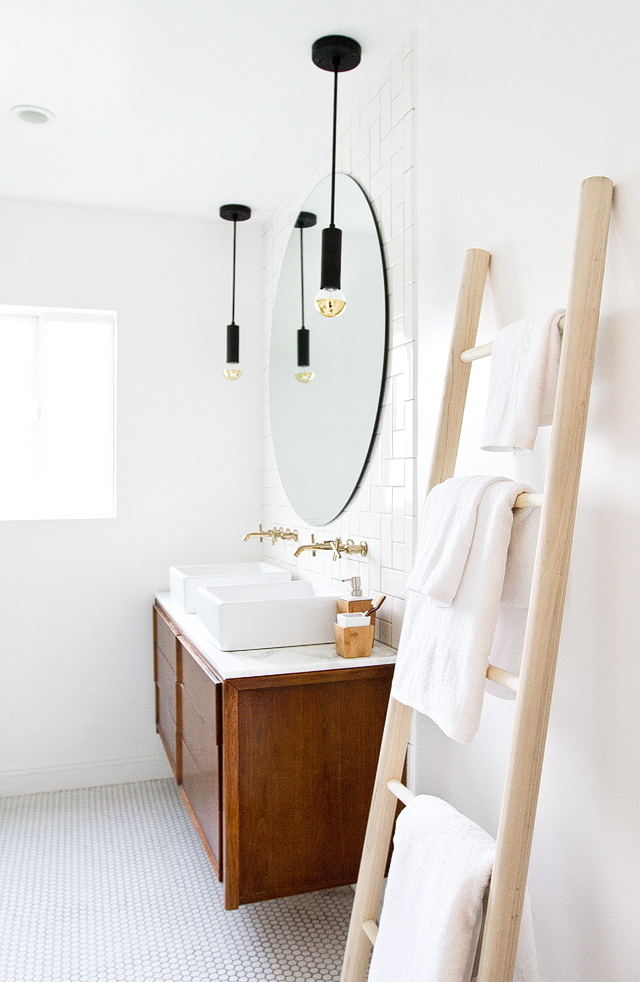
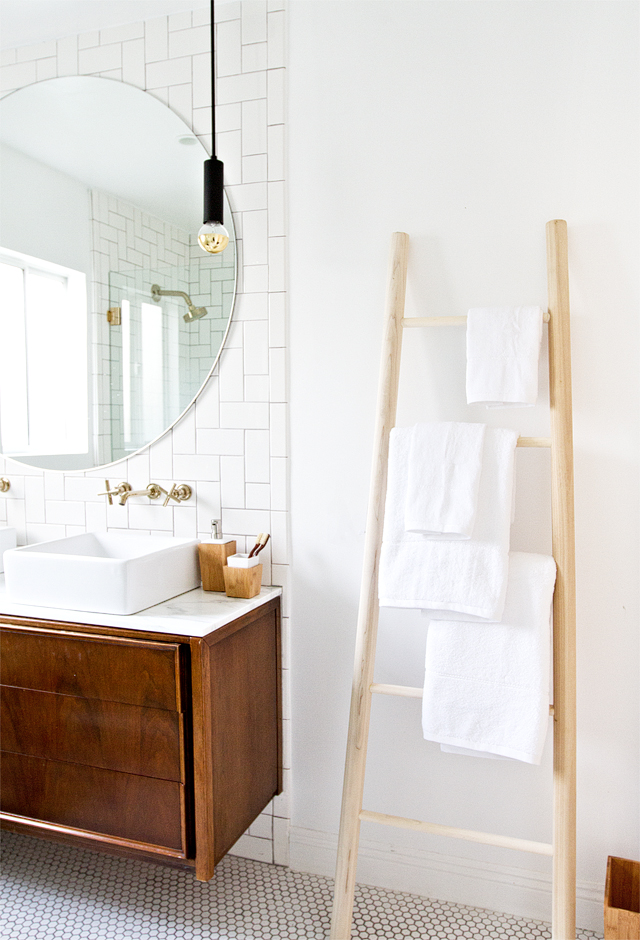 I also am loving the mix of all the different wood tones with the bamboo accessories, the vintage credenza-turned vanity and the ladder, I think it really warms up the bright white the space.
Bamboo & Ceramic Tumbler from Target // Bamboo & Ceramic Soap Dispenser from Target // Botanic Fiber Bath Towels from Target // Bamboo Wastebasket from Target // Toilet Paper Holder by Ferm Living // Pendant Lamps by Cedar & Moss // Kohler Purist Shower Head // Vessel Sink // Kohler Purist Faucet // Merola White Hex Tiles // Vintage Credenza turned vanity // Daltile White Subway Tiles // Mirror & Shower Enclosure, custom made

This post is sponsored by Target. Shop Home Décor for modern luxury made easy.
Get the details on the DIY ladder after the jump…
2, 2″ round x 72″ long wooden dowels
3, 1″ round x 48″ long wooden dowel rods
wood glue
1″ hole saw or drill press with 1″ bit
chop saw or hand saw
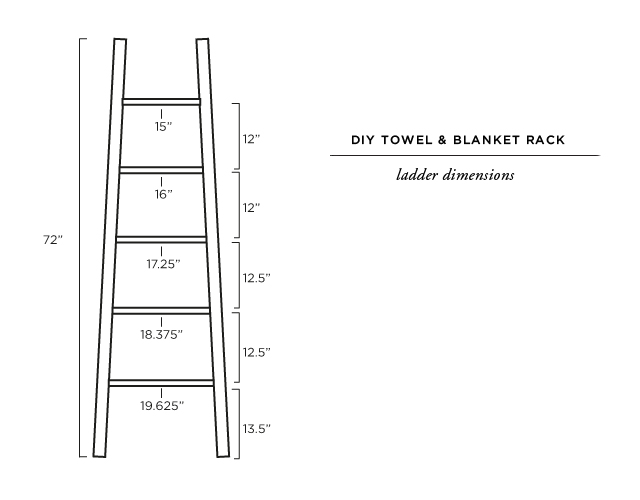
In the image above I’ve listed all the dimensions to make the tapered ladder. In order for it to be visually balanced, as the ladder gets skinnier at the top, so does the distance between the rungs (just slightly). I also listed out the dimensions to cut the 1″ dowels down to (the measurements listed just below each horizontal dowel), which is the first step in the process.
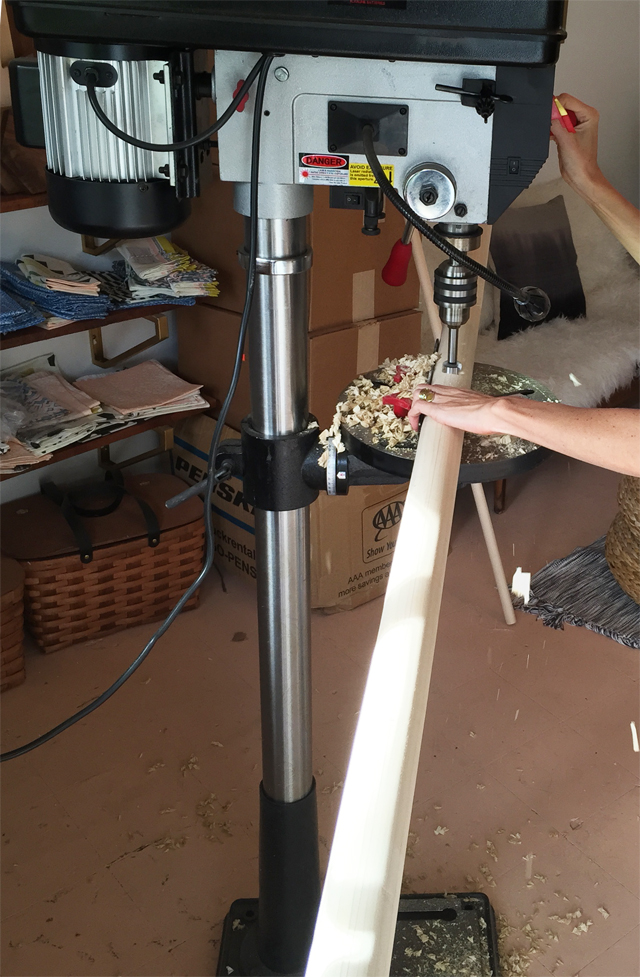 Second step is to drill the holes in the large 2″ dowel rods. The ideal way to do it is with a drill press as I am using in this photo. We put the working table of the press at just under a 3 degree angle, which is what makes the hole go in at a slight angle so that even though the vertical rods are angled in, the dowels that make the rungs of the ladder are parallel to the ground. The alternative way of making these holes would be with a drill and a hole saw, but it would be hard to get the angle just right.
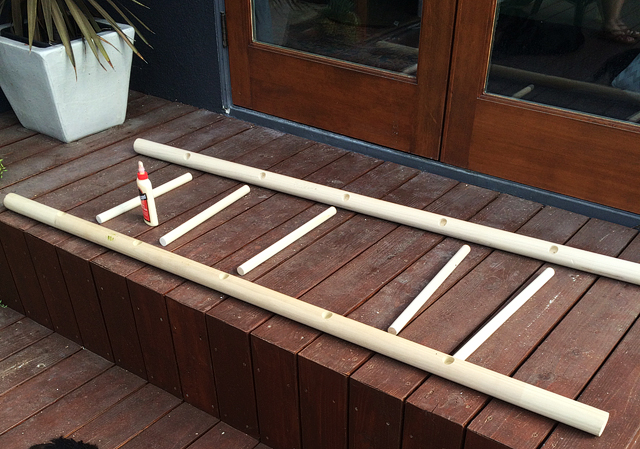 Once all the pieces are cut and the holes are drilled, all that is left is to glue it all together! I let mine sit for a couple hours on the ground, to make sure it dried straight, before leaning it up against the wall.
 One final step would be to finish it with polyurethane (if you like the color of the wood as is), or stain or paint it. I still haven’t decided on the finish yet and might stain it in the end, but for now I am liking it as a blondie.
To see the bathroom before check here (it was actually part of a bedroom)
To see all of the progress on our home renovation check here
To see more of the bathroom check here
Images by Sarah Sherman Samuel

love the new towel rack! awesome idea! the whole room is so clean and refreshing looking, absolutely love what you’ve done with it! xx. gigi. http://www.gigikkitchen.com
Very nice, as always! Would love to see a panned out view of the toilet holder. Is that a weird request? lol.
I meant toilet paper holder, but I’m sure you figured that out. 🙂
Just discovered your blog by way of a link over on Remodelista. Love it! Just spent the last half hour perusing your site and find we have lots in common. I too renovate cabins and document it on my blog called After Orange County. I enjoyed seeing your cabin restoration. Nice to meet you!
Love it all! Gorgeous! Where are those gold tipped light bulbs from?? They are amazing!
Thanks Gigi!
Hi Erin! Ha maybe next post. Although it is just in a blank wall with a toilet right now so there isn’t much going on around it but the doorway out of the bathroom. I need to get some hooks for that wall as well to hang some robes. Maybe then I’ll snap another photo.
Hi Celia, thanks for the intro! Nice to meet you too! Can’t wait to check out your renovations. X
Hi Kirsten! They are also from Cedar and Moss. (The same place as the pendants)
[…] wet, gray weather, I like to look at bright, beautiful spaces. This space is in the residence of Sarah Sherman Samuel, whom I’ve already mentioned that I adore. I love that huge circle mirror! The light and […]
Love this bathroom, Sarah!! What color grout did you choose for the floors?
Hi Sarah, I used charcoal grout on the floors. X
Hi Sarah
I just bought a Victorian Shotgun
House in NOLA.
Love some of your ideas!
Thanks!
We love this post!
I love the towel bar, it’s fresh and light, have you had any issues with it not holding together or mildew, Did you seal it? Also what kind of wood did you use?
[…] Sarah sherman samuel – The design chaser […]
[…] Inspiration via Sarah Sherman Samuel […]
Gorgeous Darling! <3
I am in the process of aquiring a large round mirror myself…may I ask, did you choose a slight beveled edge or is it flat polished edge?
Thank you kindly 🙂
Did you put wet towels on this? Did they dry folded like that? Or is this only for clean/dry towel storage?
Hi Stephen,
These are dry clean towels but we hang the wet towels loosely over the top of the vertical rungs to dry.
This is so lovely! We are purchasing the same faucet and are trying to discern all the different finishes. May I ask which finish this one is? Thanks!
Can I ask where you found the faucets and what they are called? I’ve been looking for something like this in a brass finish for ages.
[…] the post: Washer and Dryer by Electrolux // Vintage Rug from Frances Loom // Ladder is a DIY (see how to make on here) // Towels // Hat is vintage // Baskets are a DIY (post coming soon!) // Wallpaper is custom by […]
[…] the post:Washer and Dryer by Electrolux // Vintage Rug from Frances Loom // Ladder is a DIY (see how to make on here) // Towels // Hat is vintage // Baskets are a DIY (post coming soon!) // Wallpaper is custom by […]
[…] (Image credit: Sarah Sherman Samuel) […]
[…] (Image credit: Sarah Sherman Samuel) […]
[…] (Image credit: Sarah Sherman Samuel) […]
[…] Foto: Sarah Sherman Samuel […]
[…] Foto: Sarah Sherman Samuel […]
[…] I love the look of these towel ladders! You can easily make these for a living room too to hold throws. They can be expensive and also it can be hard to find one that fits the exact dimensions that you need. Especially in a bathroom. This DIY version looks as good as a fancy store bought one. Check out the full tutorial over on Sarah Sherman Samuel. […]
[…] and Dryer by Electrolux // Vintage Rug from Frances Loom // Ladder is a DIY (see how to make on here) // Towels // Hat is vintage // Baskets are a DIY // Wallpaper is custom by Sarah Sherman Samuel // […]
[…] source […]
[…] Full Project: Bathroom Refresh And DIY Towel Ladder […]
[…] Afbeelding 1 | Afbeelding 2 | Afbeelding 3 | Afbeelding 4 | Afbeelding 5 […]
[…] Source : Sarah Sherman Samuel […]
[…] are in love with this ladder bathroom towel storage from ‘Sarah Sherman Samuel‘. She has complete plans on how to make this fresh bathroom organizer, and any beginner can take […]
[…] Sarah sherman samuel […]
[…] image source […]
[…] ladders look so much more stylish and they hold many more towels. I love the tapered look of this DIY towel ladder and the natural wood which looks great in a white bathroom. Of course this ladder would work just […]
Amazing tips! I think most of the people did not know about it. Thanks for sharing such nice tips! I really love this blog and content is really useful. Thanks for telling us about the importance of solvency. Keep sharing this post more and more.
The DIY are very well made, extremely informative and the directions are easy to follow.
[…] via Sssedit […]